Like death and taxes, painting your house is another one of those things in life that eventually comes calling. According to the Internet, most homeowners can expect to repaint their house every 10 to 15 years, depending on the type of siding they have and other factors. This sounds a lot like the advice you get from plumbers who say you need to replace your water heater tank every 10 to 15 years, doesn’t it? But anyway, whether you live in a house that’s sealed in a vacuum or ravaged by the elements, the exterior will eventually need repainting.
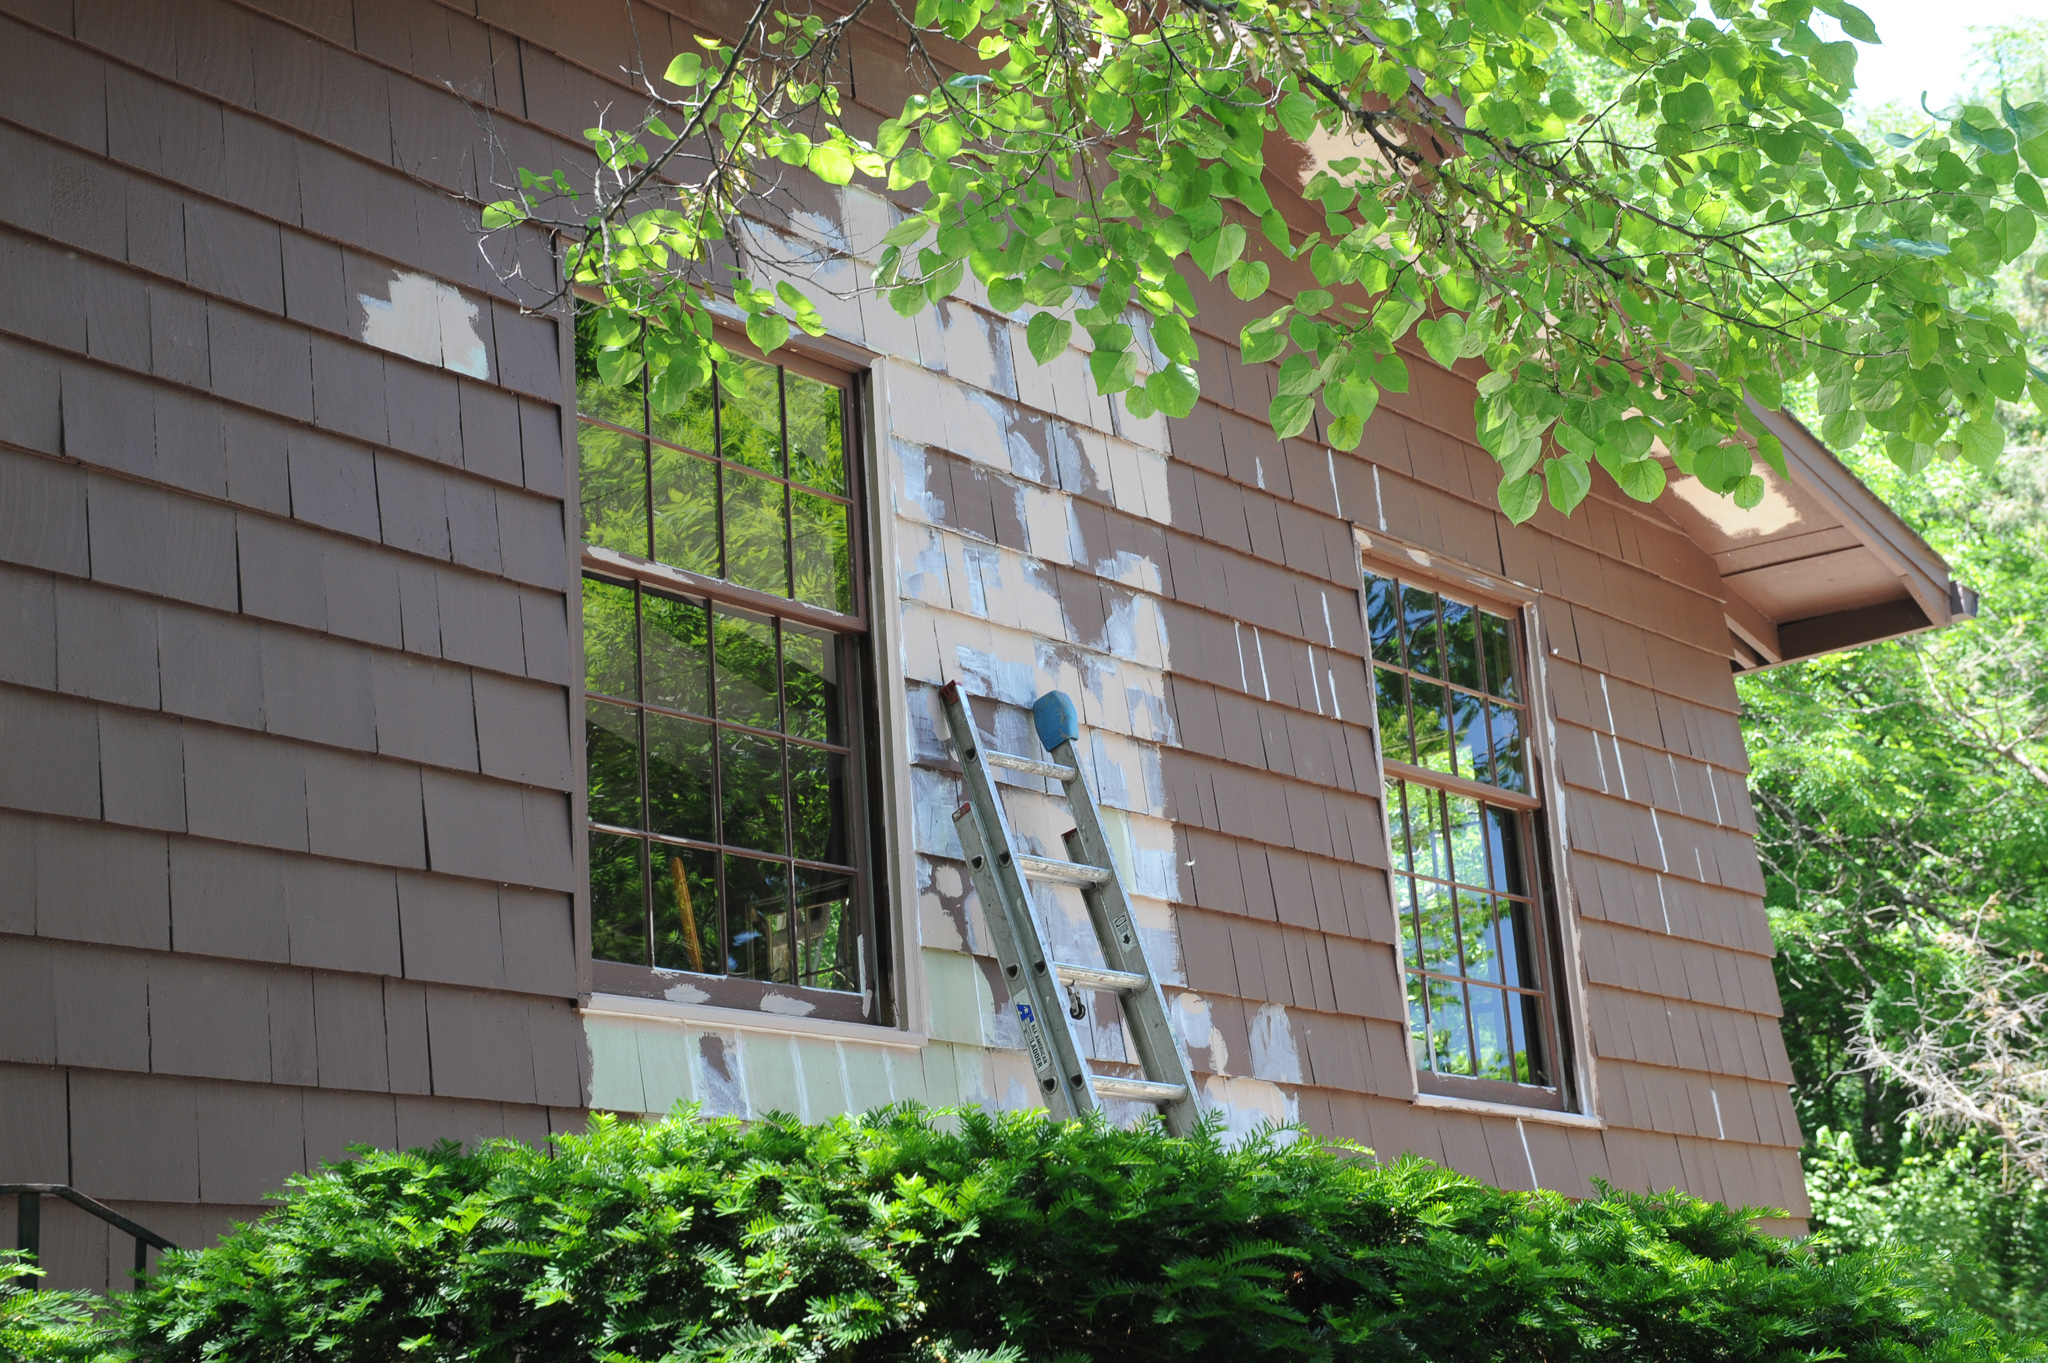
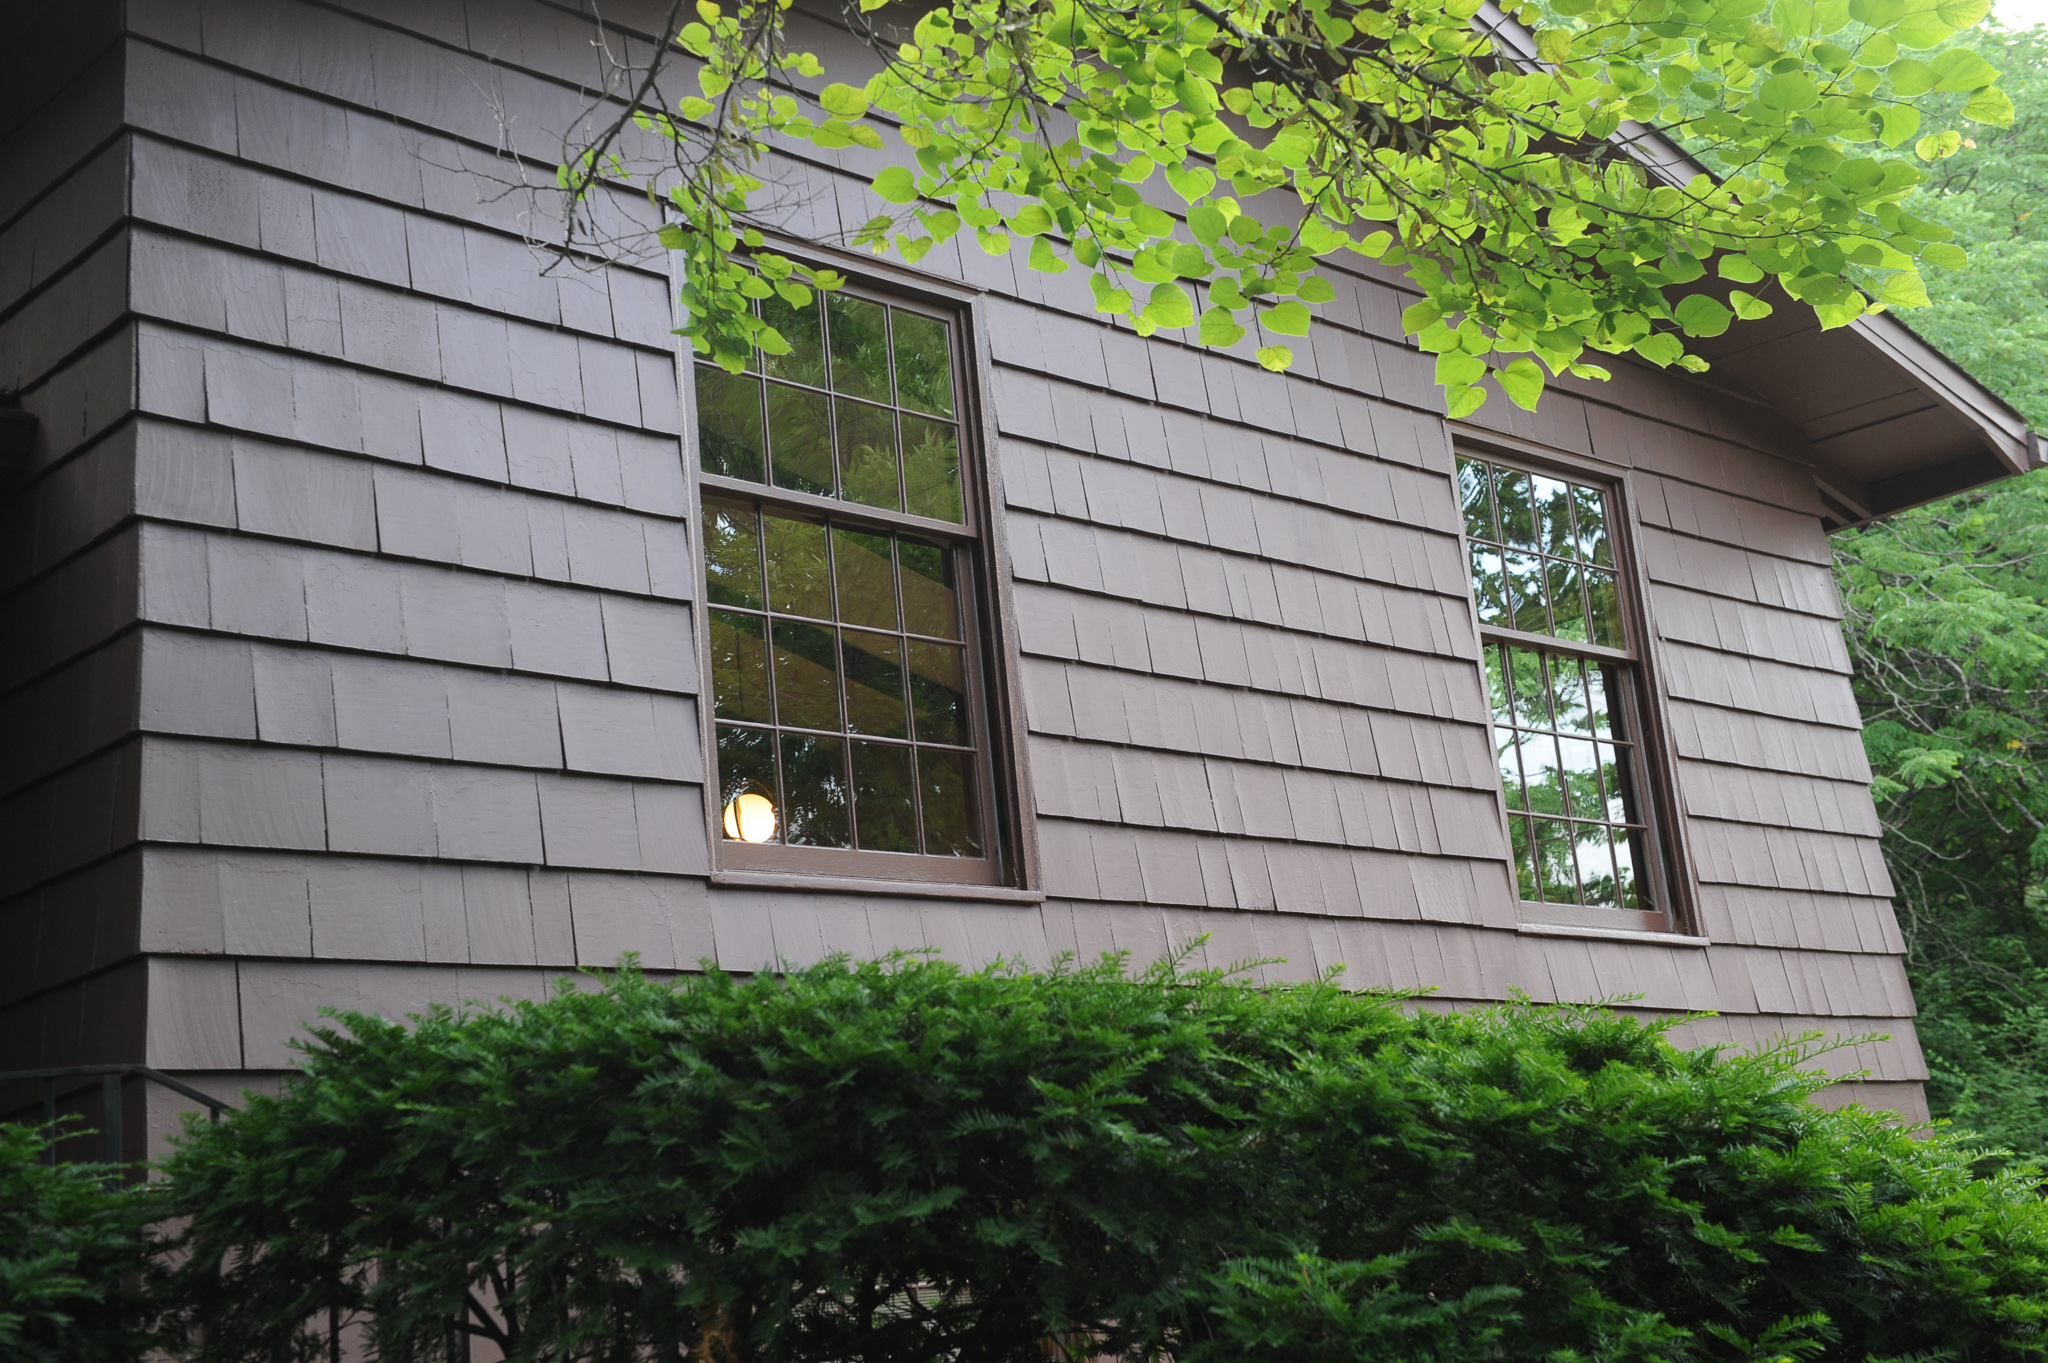
In our case, the inevitable became increasingly unavoidable about four or five years ago when I started to notice the telltale signs around our house: paint fading, cracking, peeling, bubbling; paint flaking away on window frames and sills, exposing dry-rotted wood; rotting wood along the bottom of cedar boards and cedar shingles; warped cedar siding. The deterioration was especially noticeable on the eastern facade, which endures a merciless pounding from the sun all summer long. Things were starting to look bad.
Despite the worsening situation, I held off repainting the house until this year because 1) I’m a drive-it-’till-the-wheels-come-off cheapskate, and 2) I absolutely dreaded the prospect of having to deal with the mess and hassle of repainting. (I have some very un-nostalgic memories of helping my stepfather remove layers of oil-based paint—undoubtedly lead-filled—from the house I grew up in Maine during my 6th-grade summer vacation.) While I considered hiring a crew of local college kids who would parachute in and likely knock out the job in a week or less, my wife and I decided it would be wise to take a more historically sensitive approach by hiring a contractor who specializes in painting historic houses.
Historic, you say? We live in a house that is described by our insurance company as a “tri-level ranch”—hardly “historic,” right? This dismissive categorization is out of date and culturally tone-deaf, however. Some midcentury houses are approaching 100 years old and are increasingly being added to local, state, and national historic registers. Many have soared in value, even ones that were not designed by modern architects. They should be treated with historic preservation in mind, i.e., with the same kind of respect and attention that is lavished on the Victorian mansions of Old West Lawrence (OWL). That is, if you can afford it.
And as you will see, it is affordable if you are willing to get your hands a bit dirty. But more on that later.
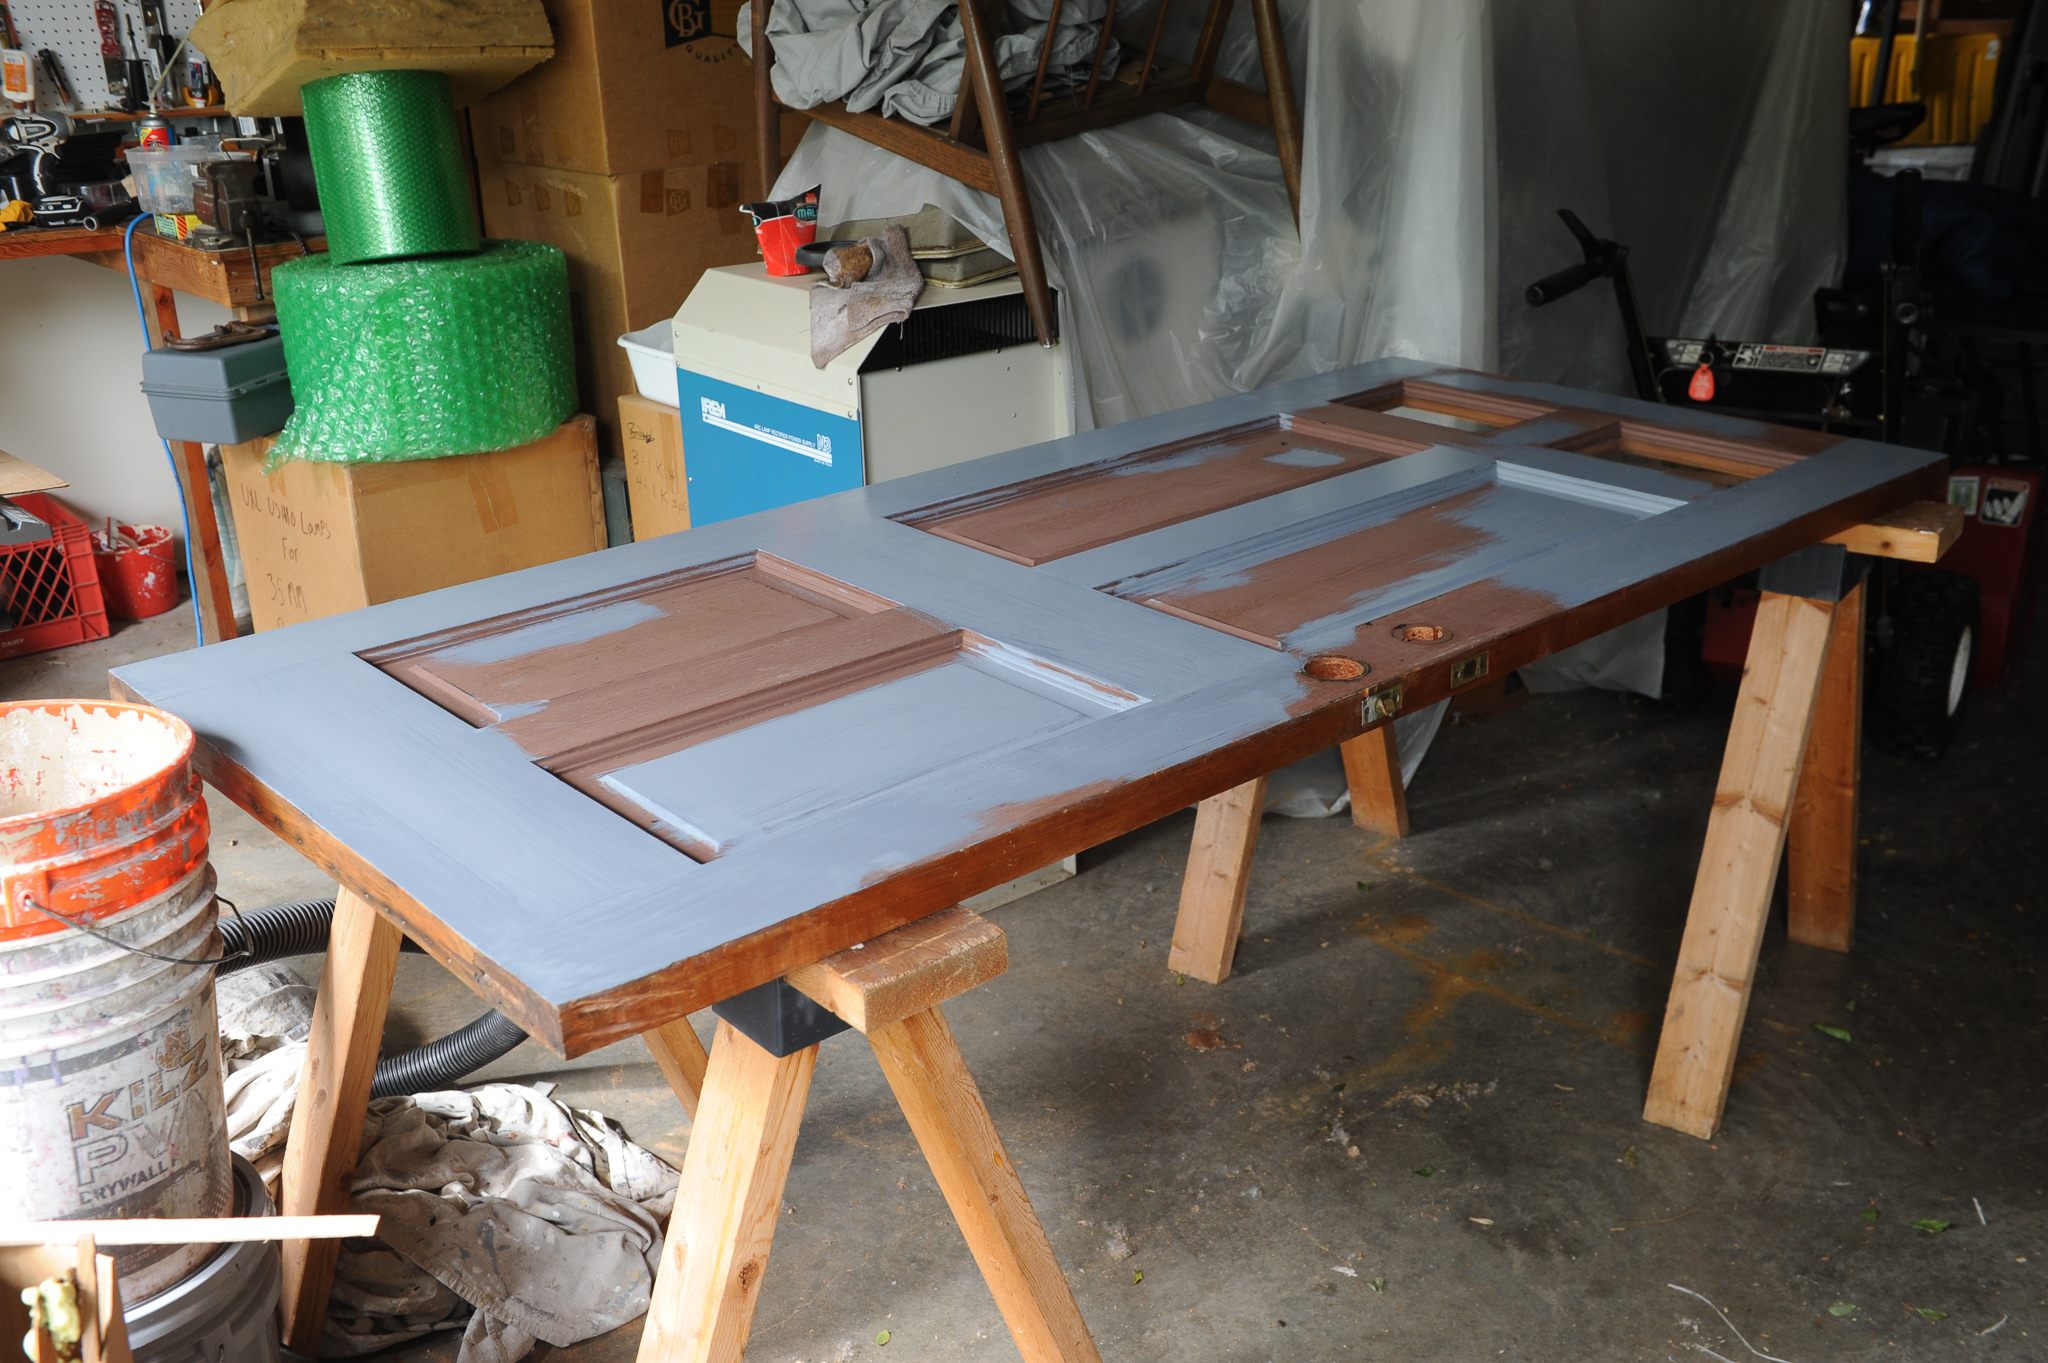
Last summer, upon a referral, we sought out the services of a Mr. Rob Lacey, a lanky and dexterous 50-something who, for 25 years, has ensured the exterior (and interior) preservation of many OWL dwellings. After two on-site consultations, Rob provided a basic services proposal using Benjamin Moore Ultra Spec flat or satin paint for $9,480. (If we wanted to change the original color, it would cost an additional $4,250.) This fit within our budget, which I estimated would land somewhere between ten to fifteen grand. As part of the deal, Rob agreed to discount the price when I offered to prep the front door for painting, handle storm window removal and reinstallation, and also clean all the windows.
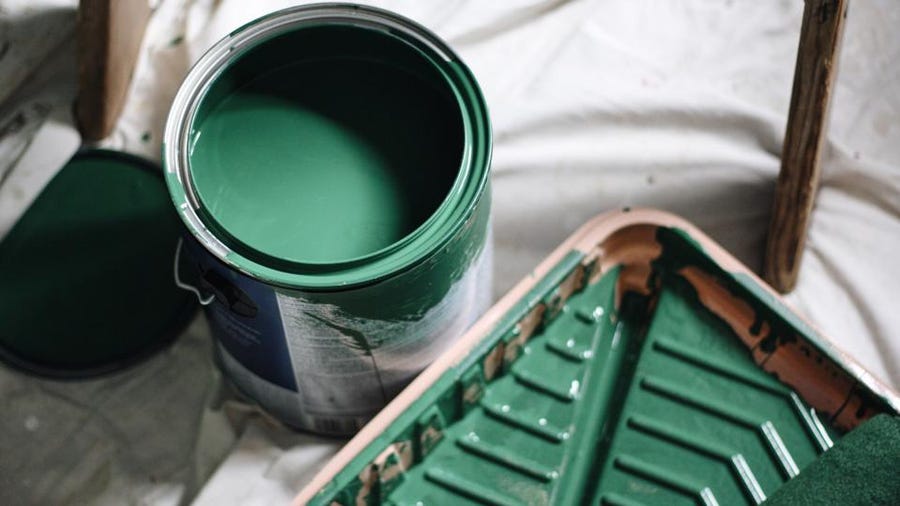
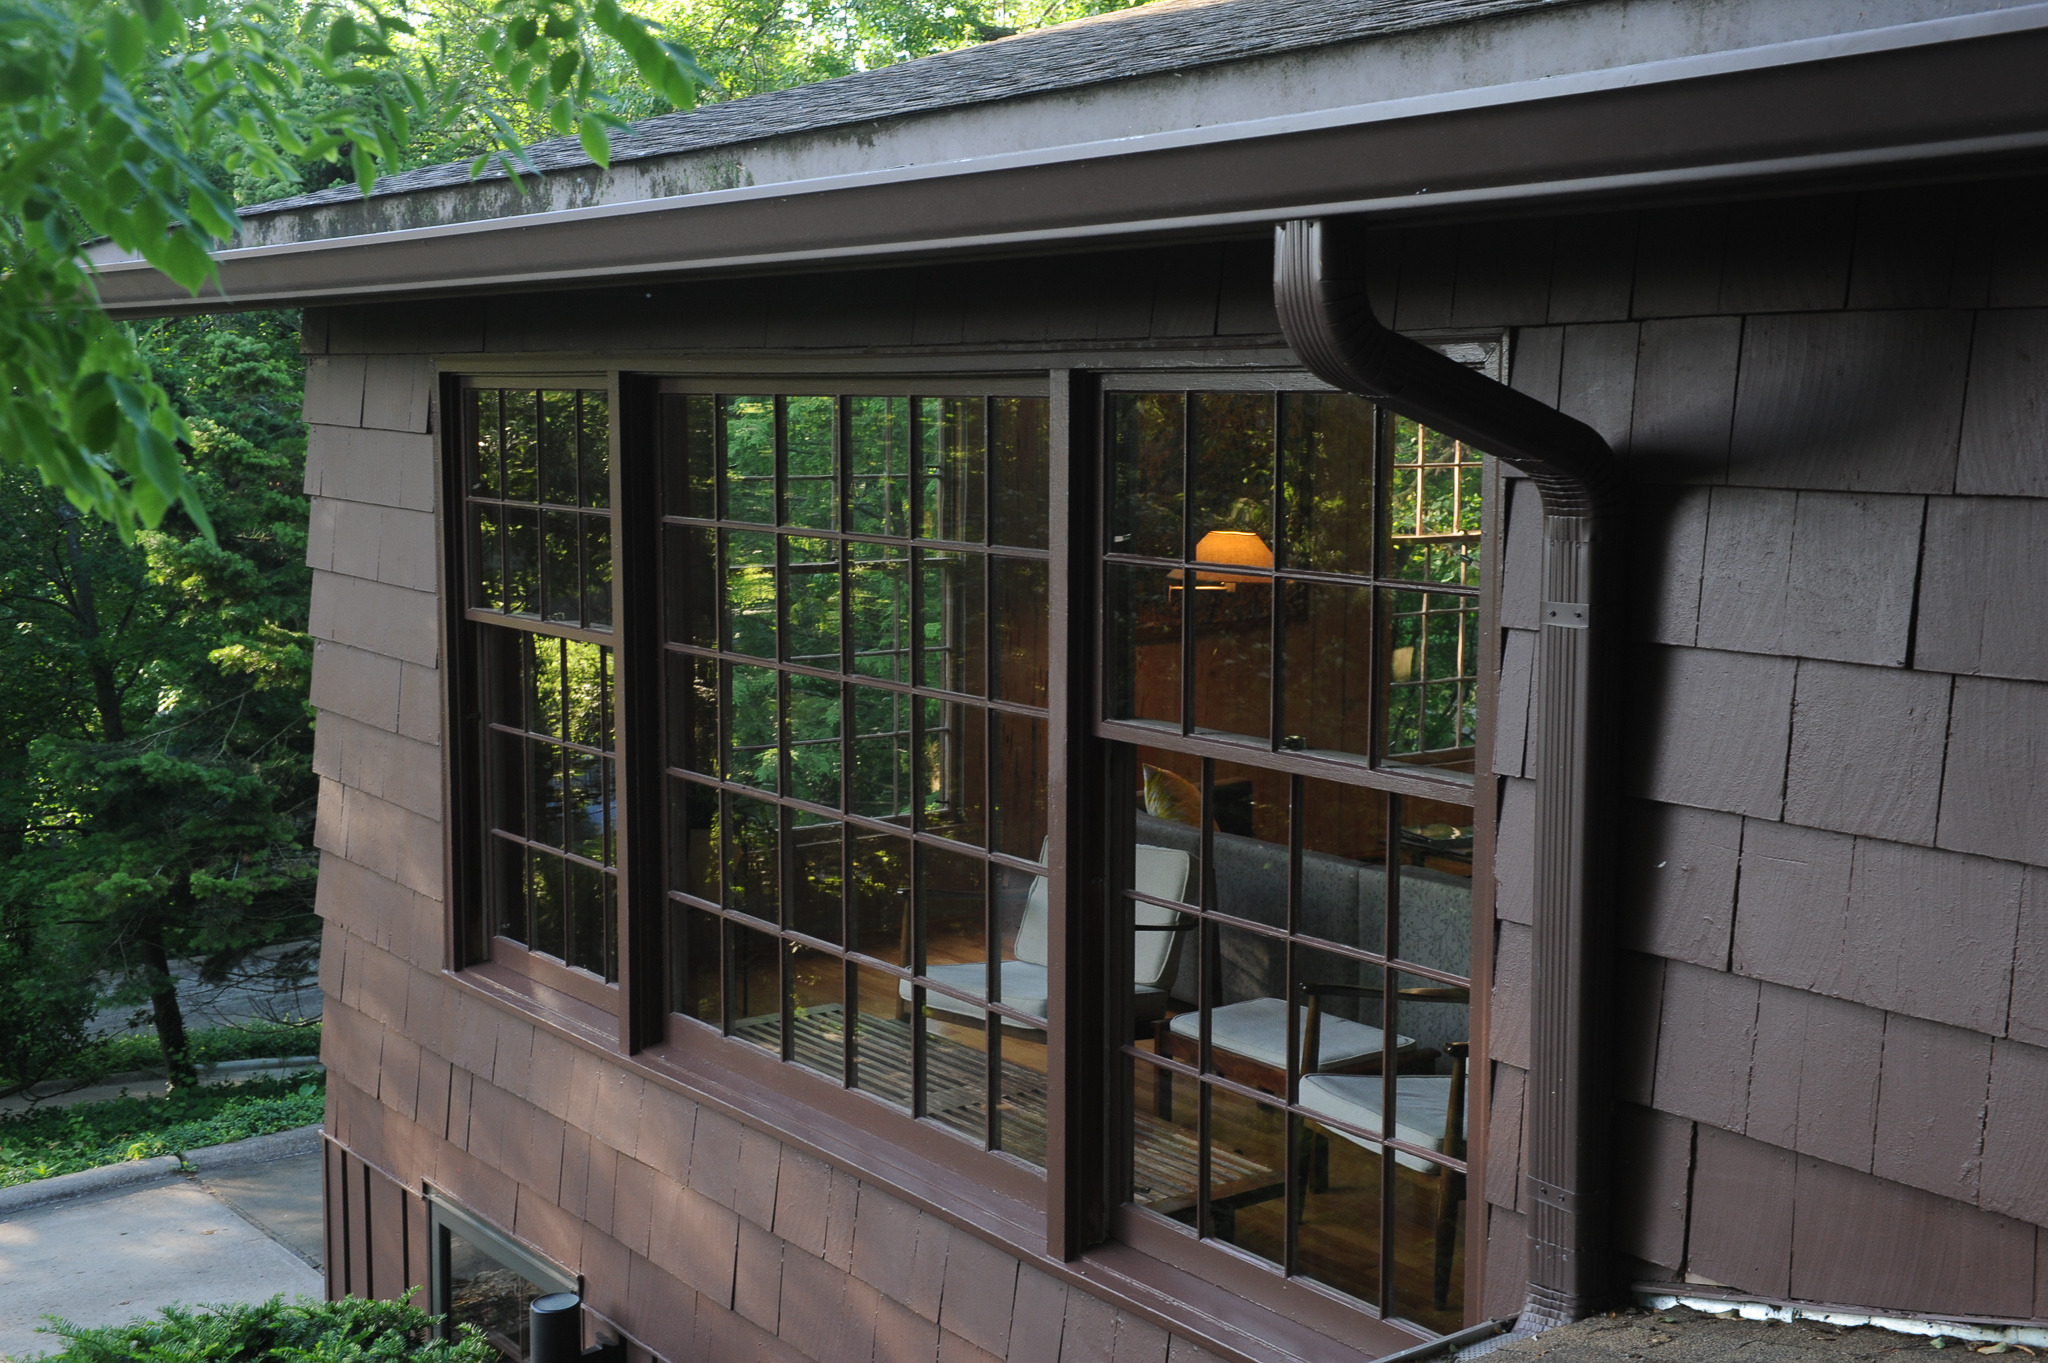
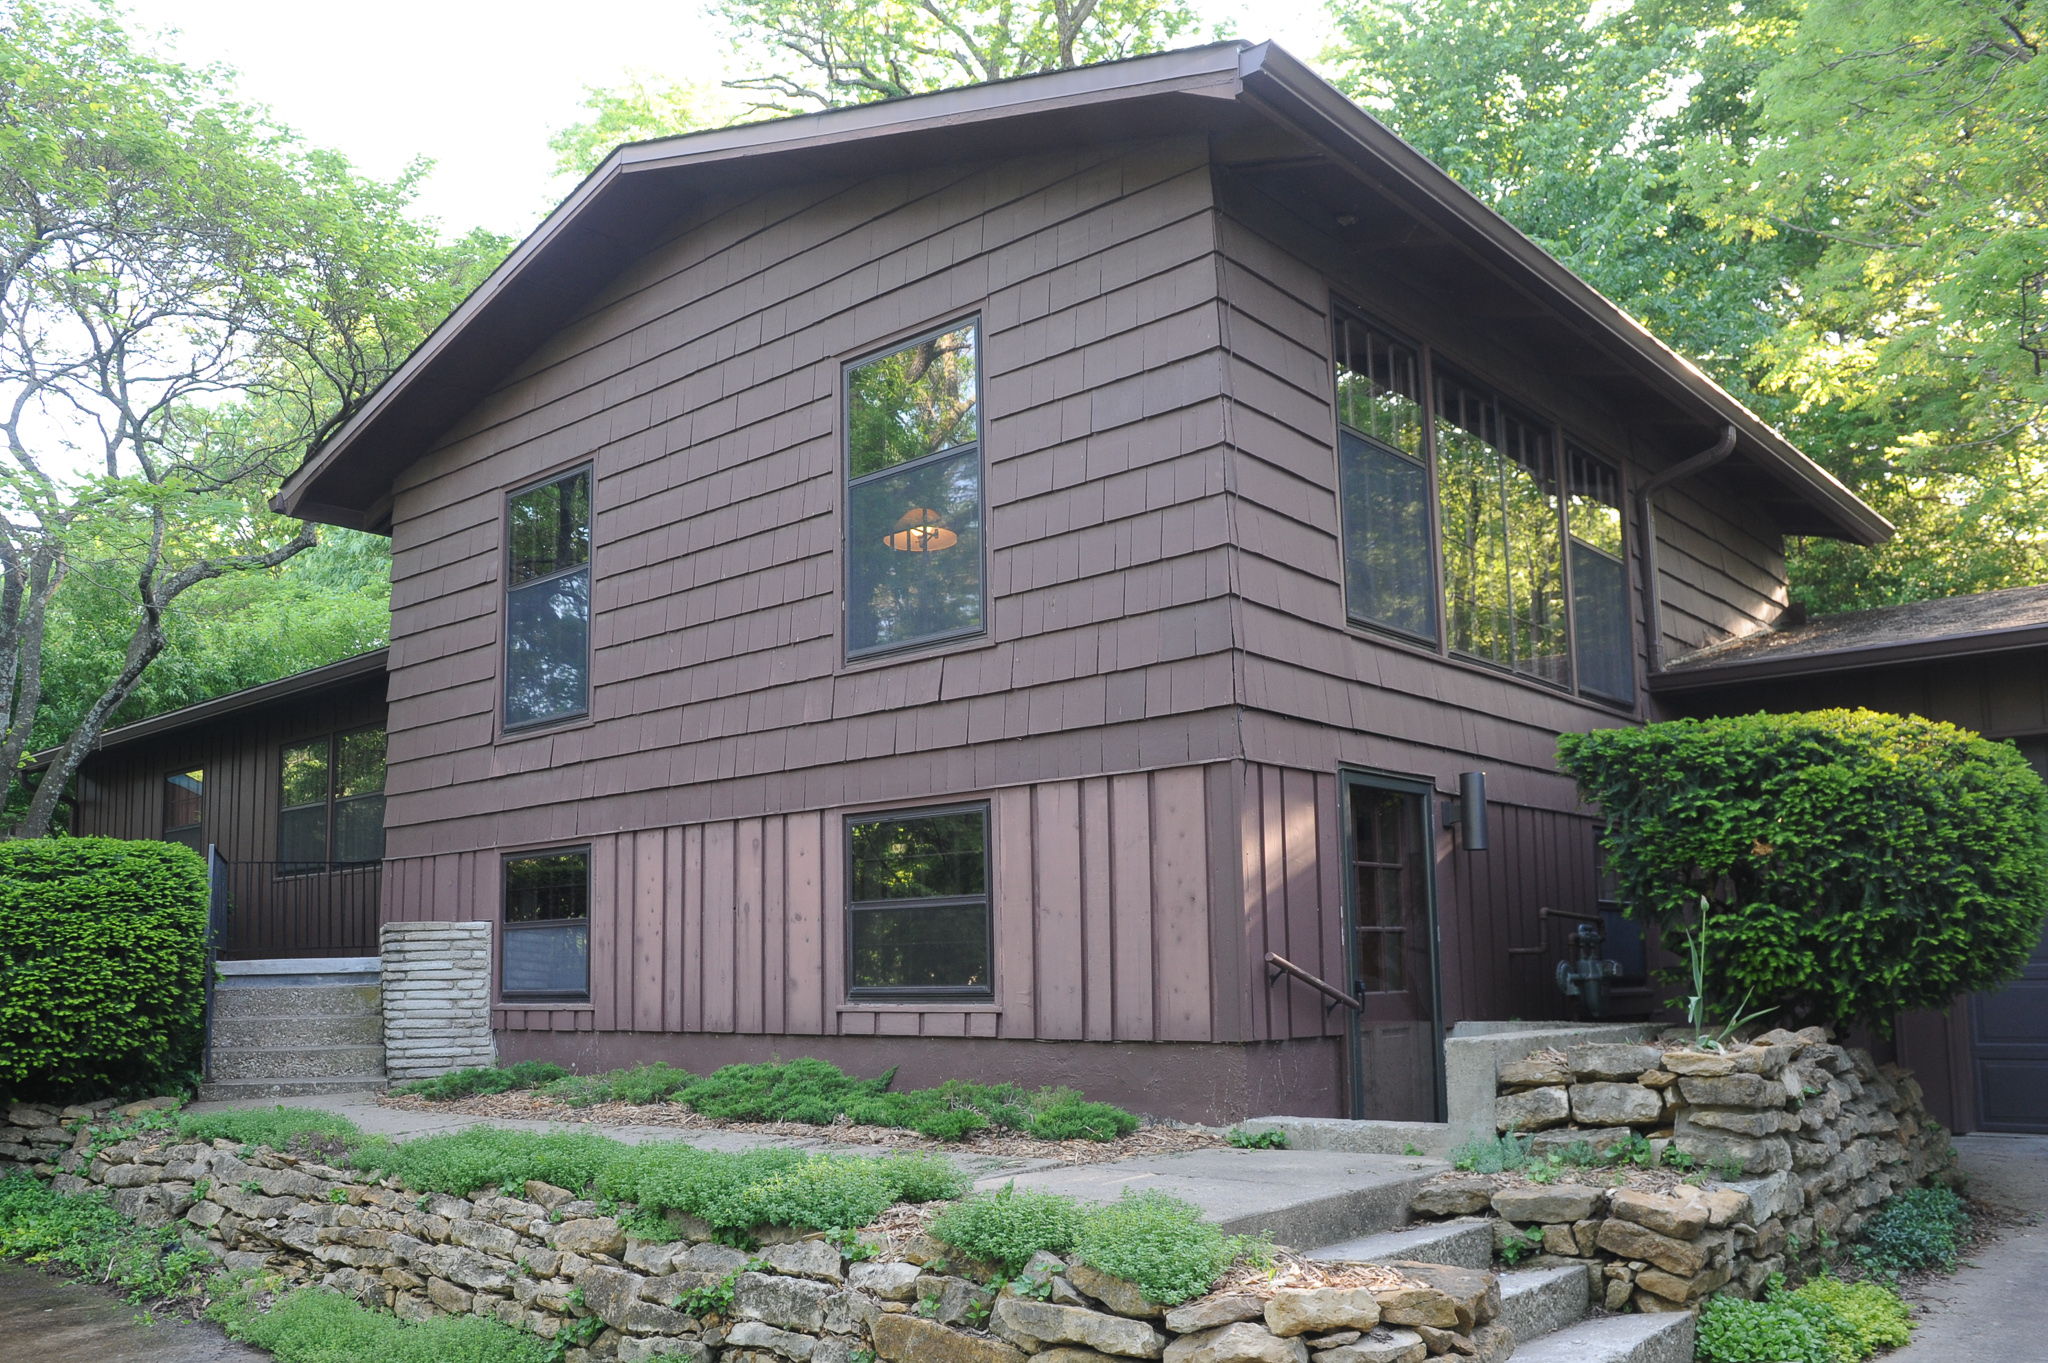
The only thing left to decide was the paint color and finish type. This led to some debate as we considered the economics, aesthetics, and environmental impact of our choice. Dark paint absorbs heat, which is a problem for our poorly insulated house. I calculated, however, that the heat gain in summer would be offset by heat loss in winter, practically negating each other. We decided to keep the same dark brown color the house had when we bought it in 2007, and as we later found, hadn’t changed since the house was built. Meanwhile, Rob convinced us to go with a flat finish for the body and satin for the trim after proving in a demo that satin would dramatically highlight the imperfections of our cedar siding, akin to applying oily makeup on acne.
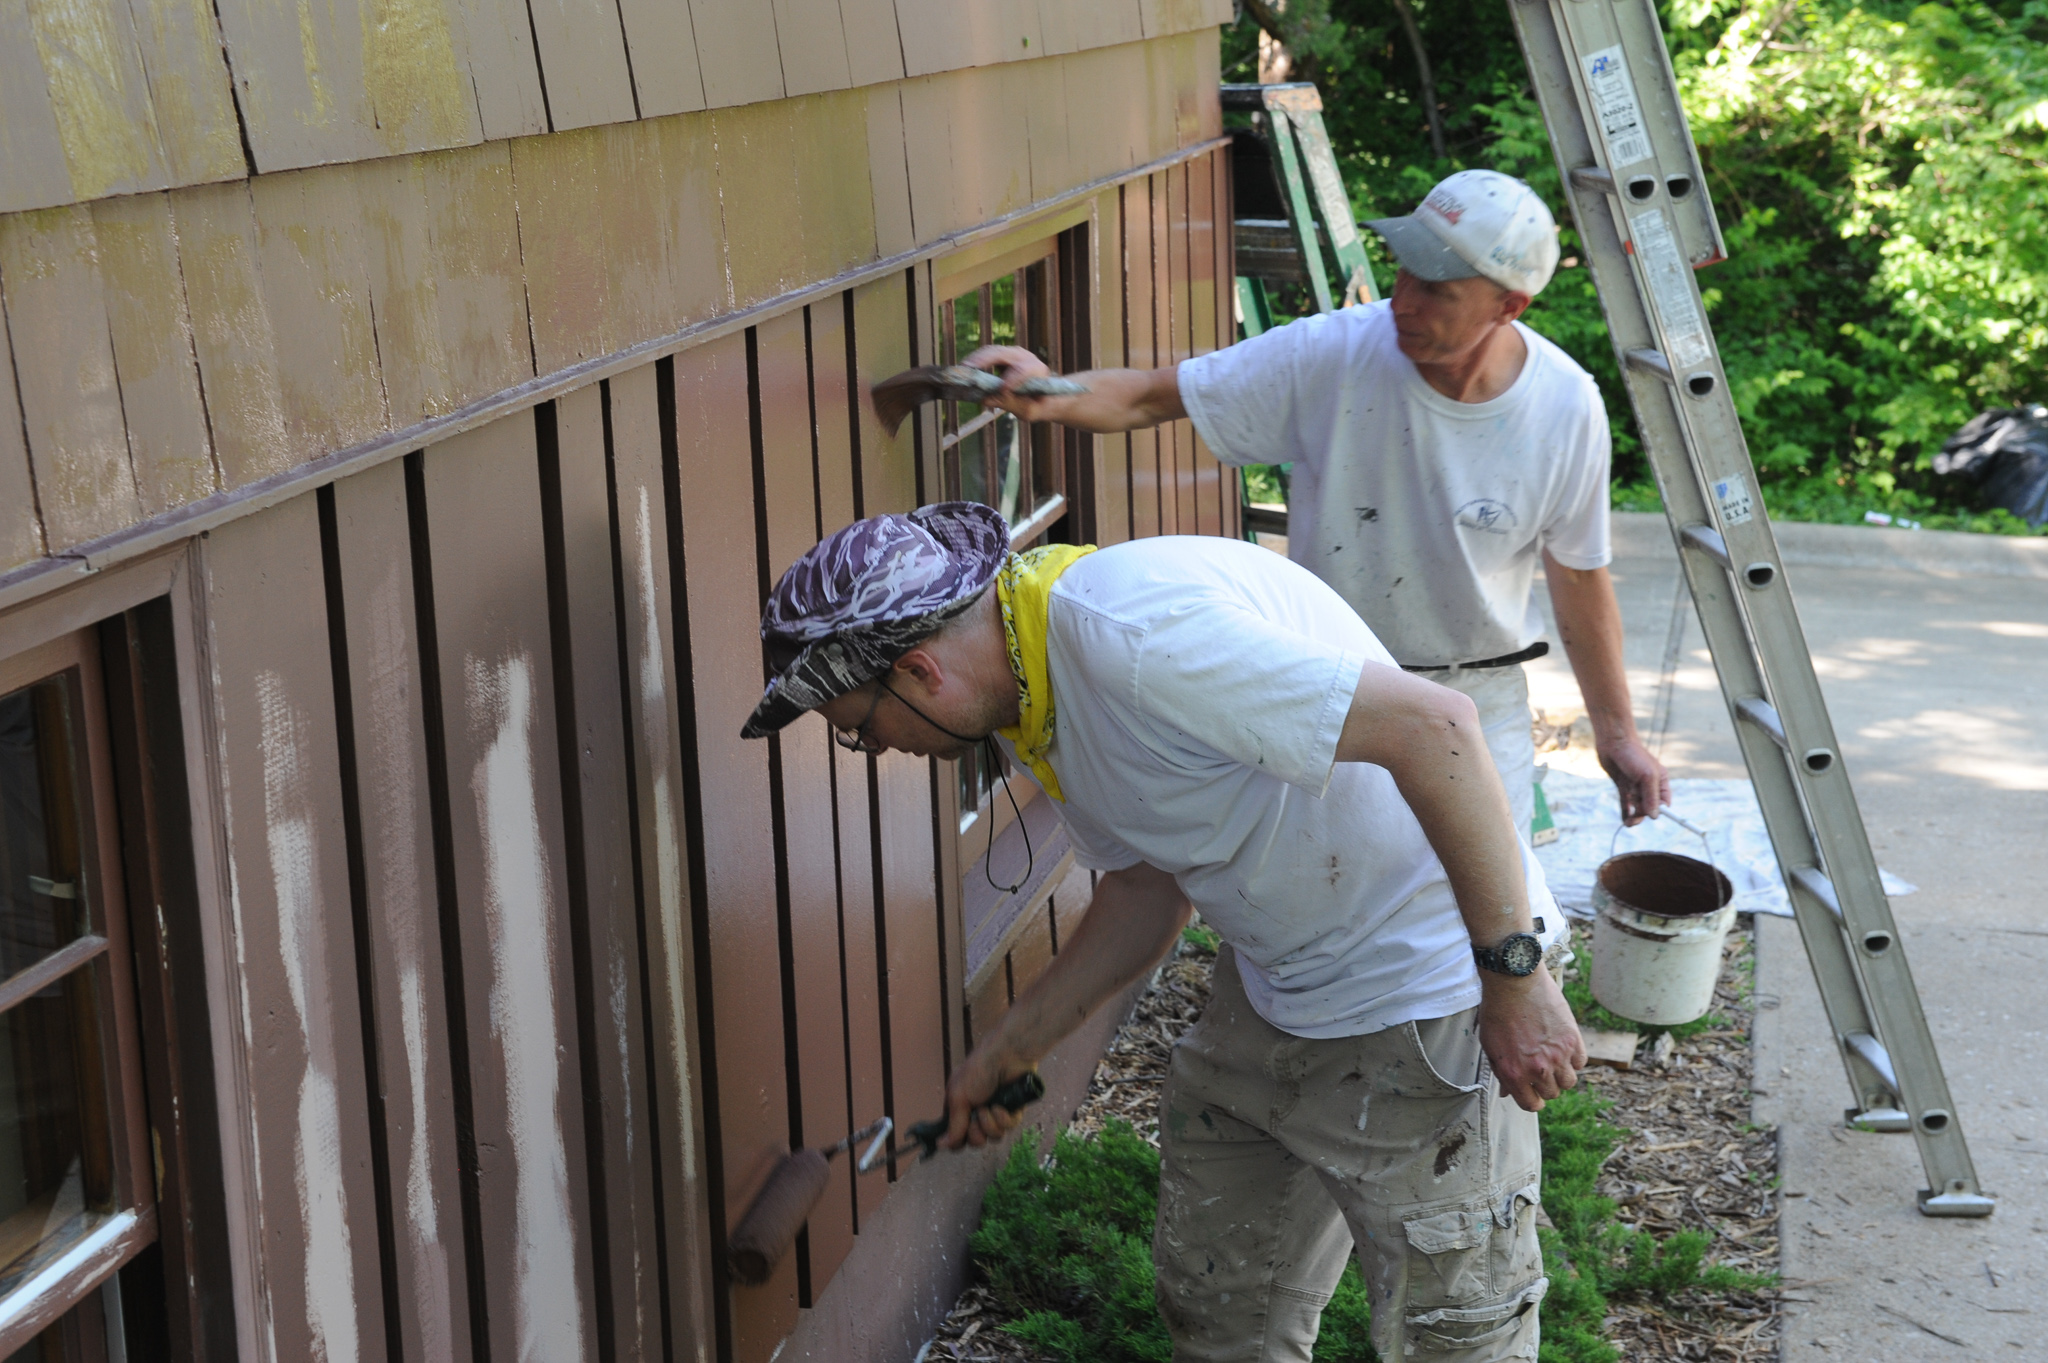
Rob scheduled us for August 2022—his earliest available date—but when a client ahead of us postponed their plans, we suddenly jumped to the head of the line. Rob and his crew, Daniel and Tony, arrived on site in mid-May to start work.
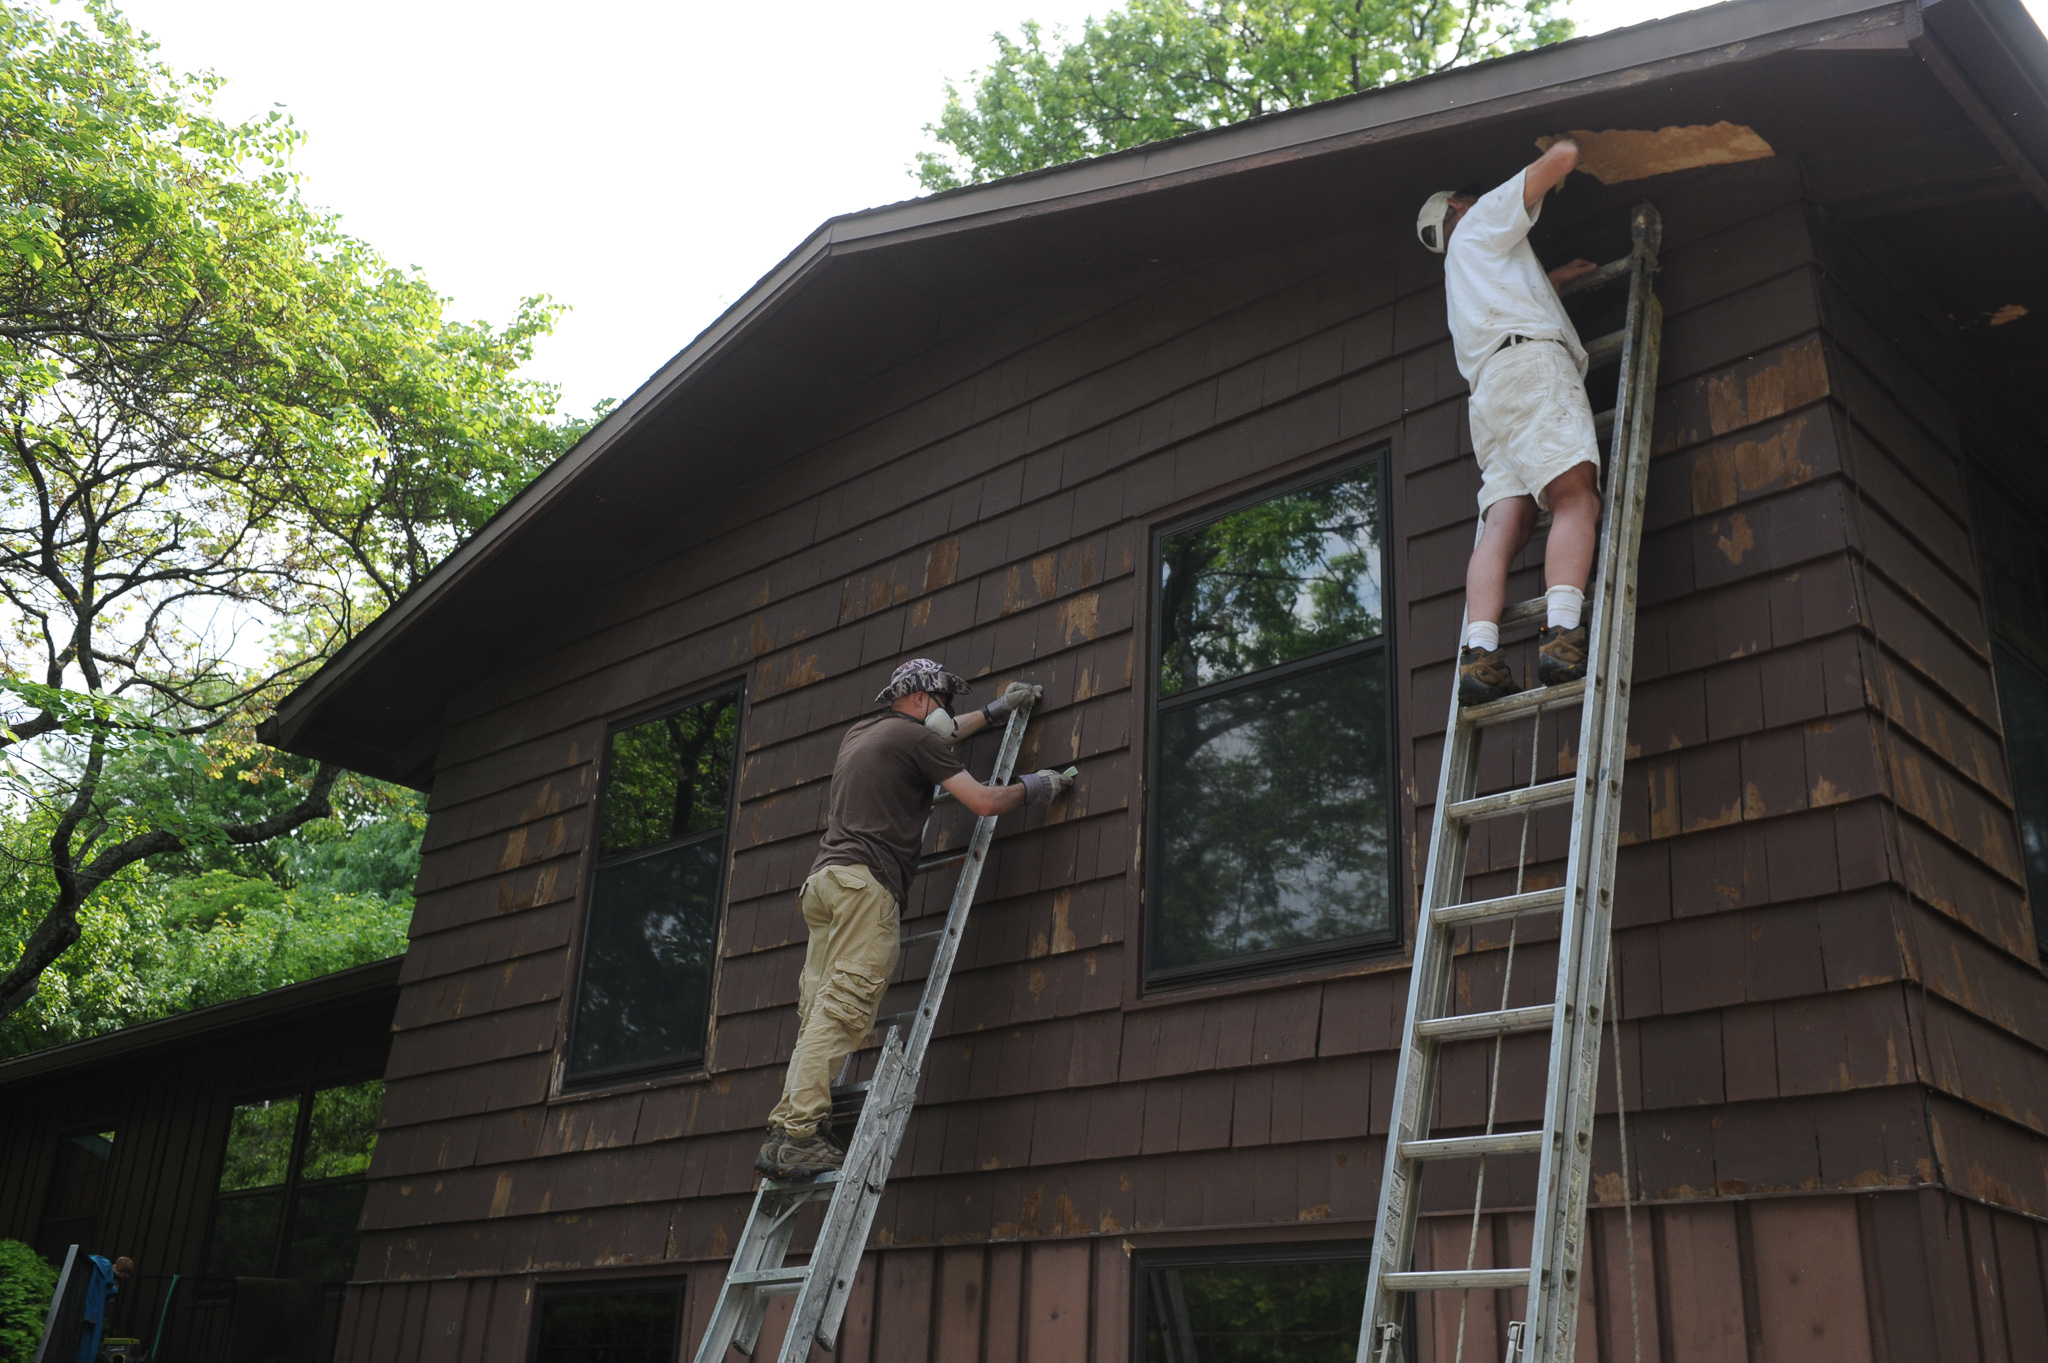
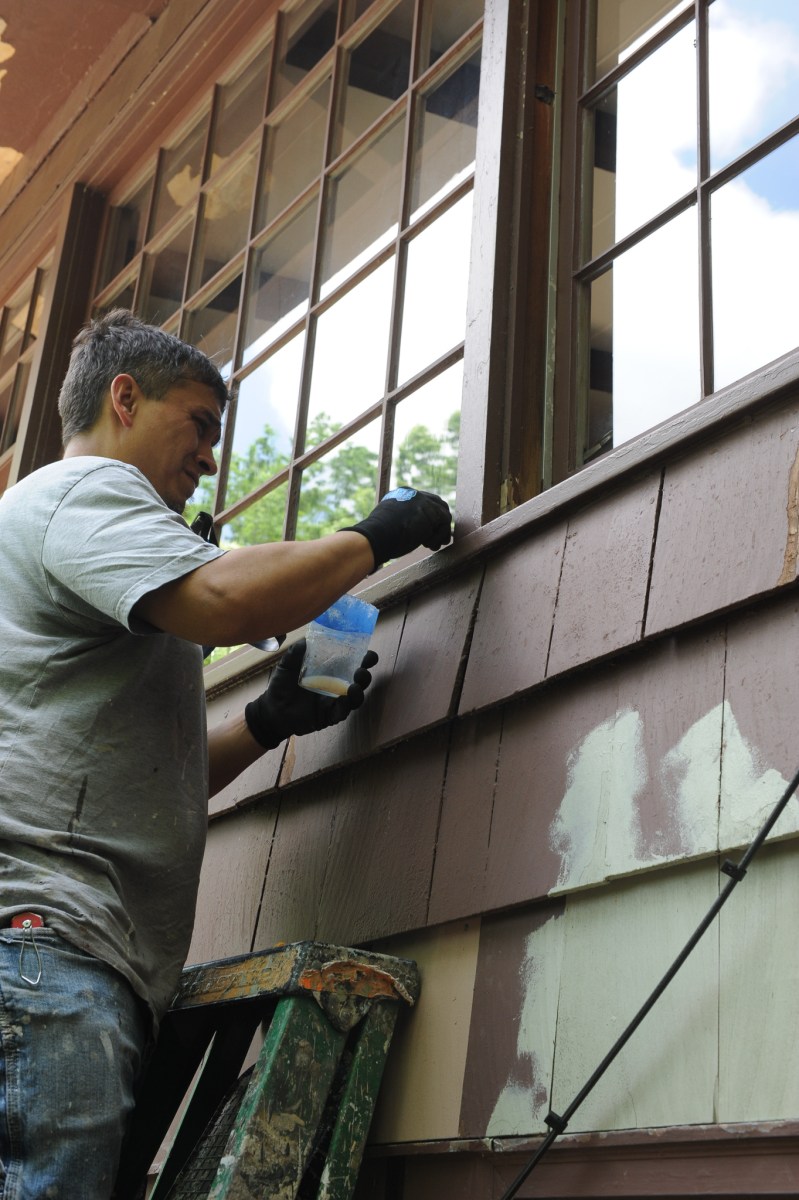
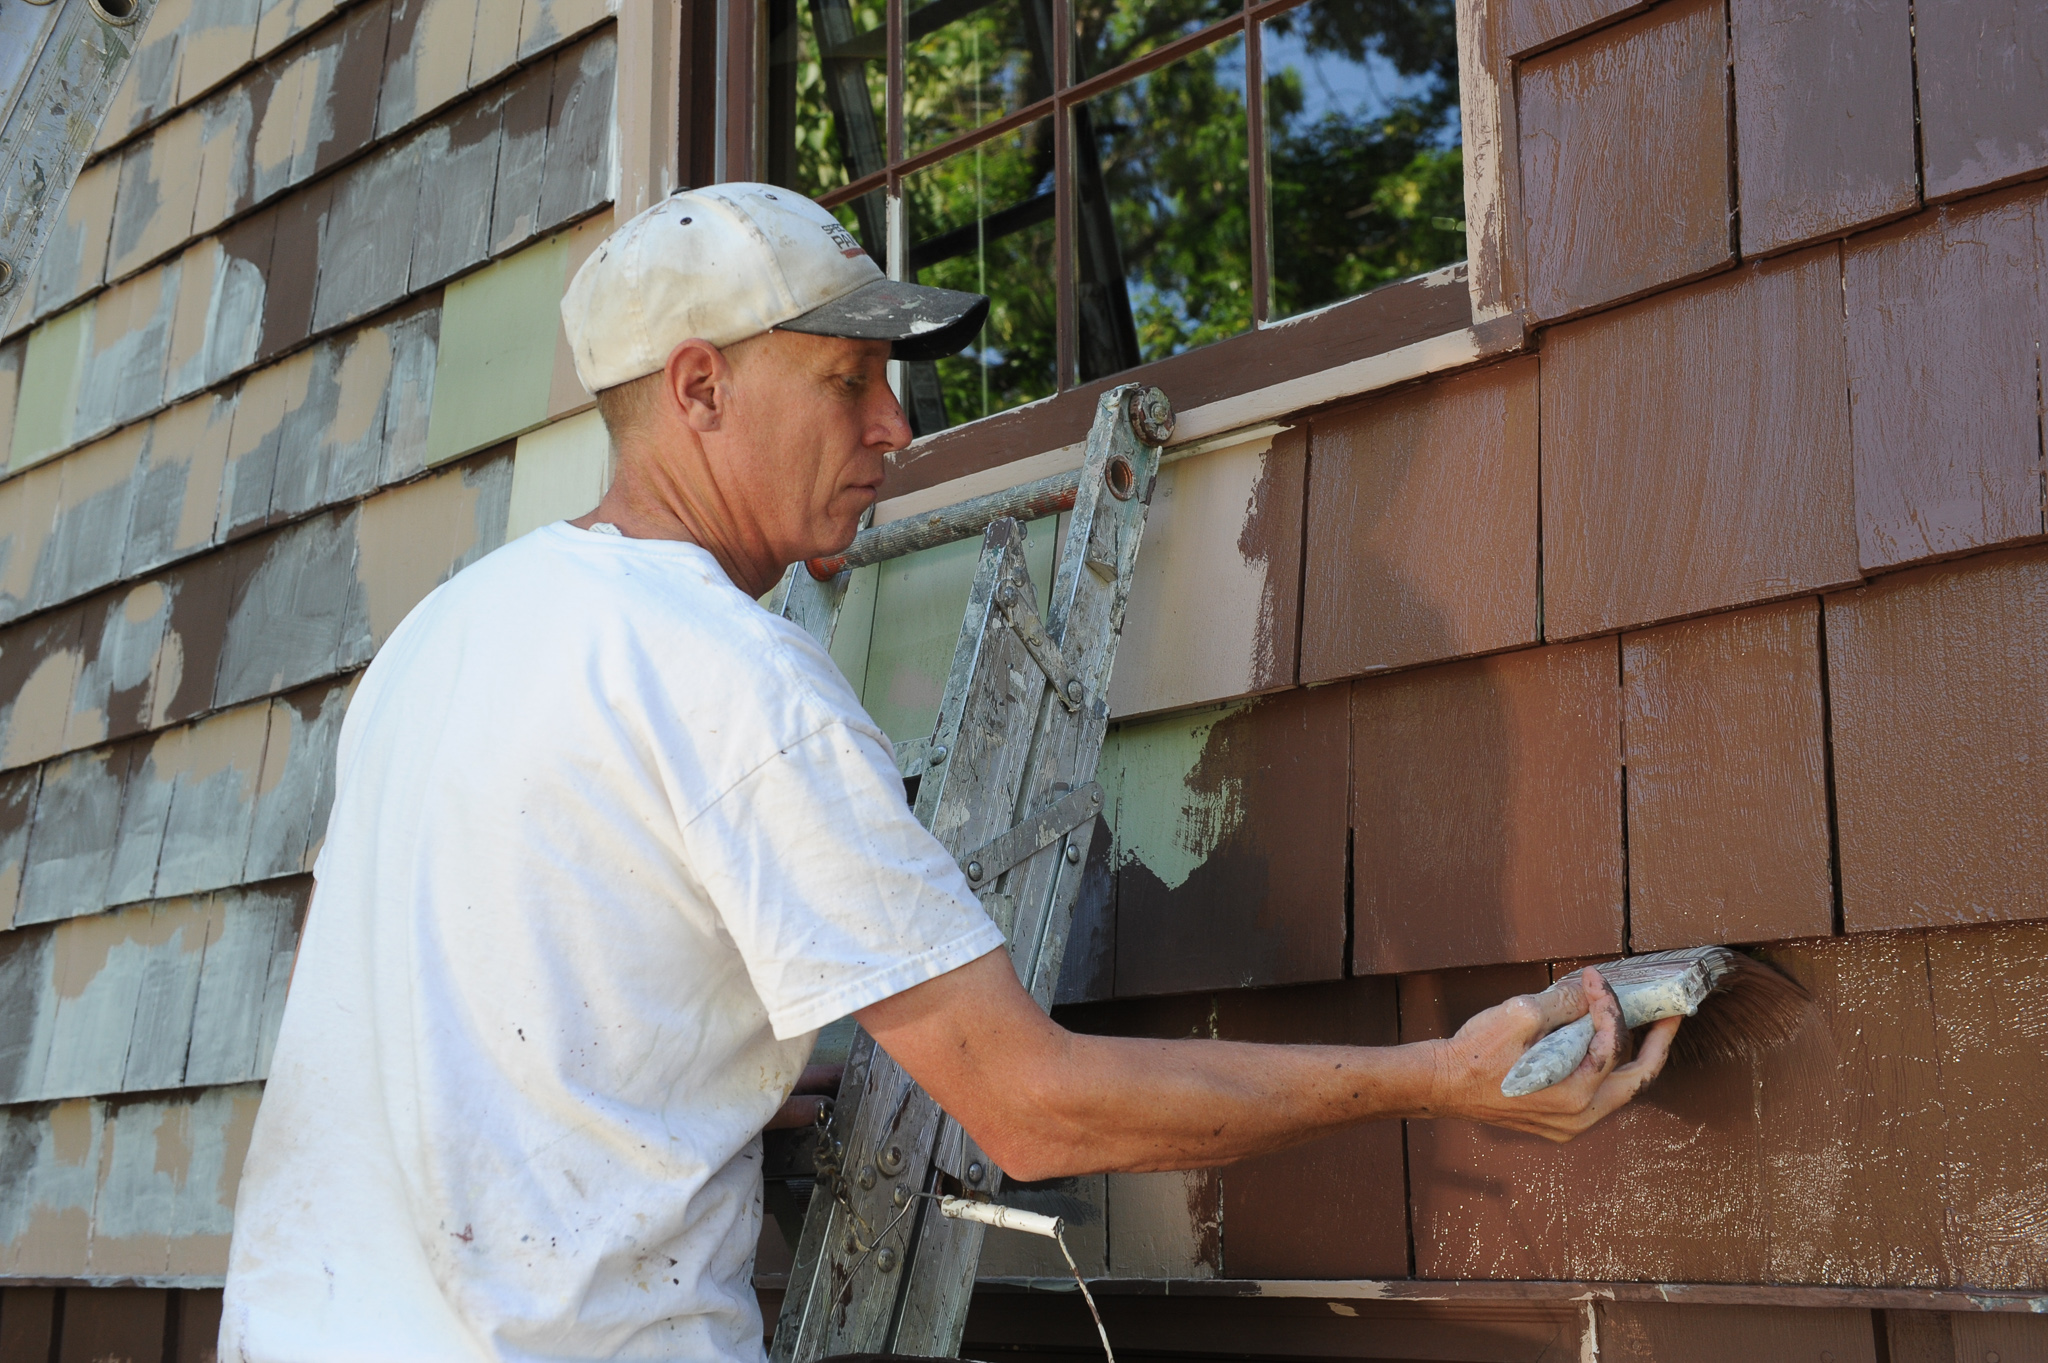
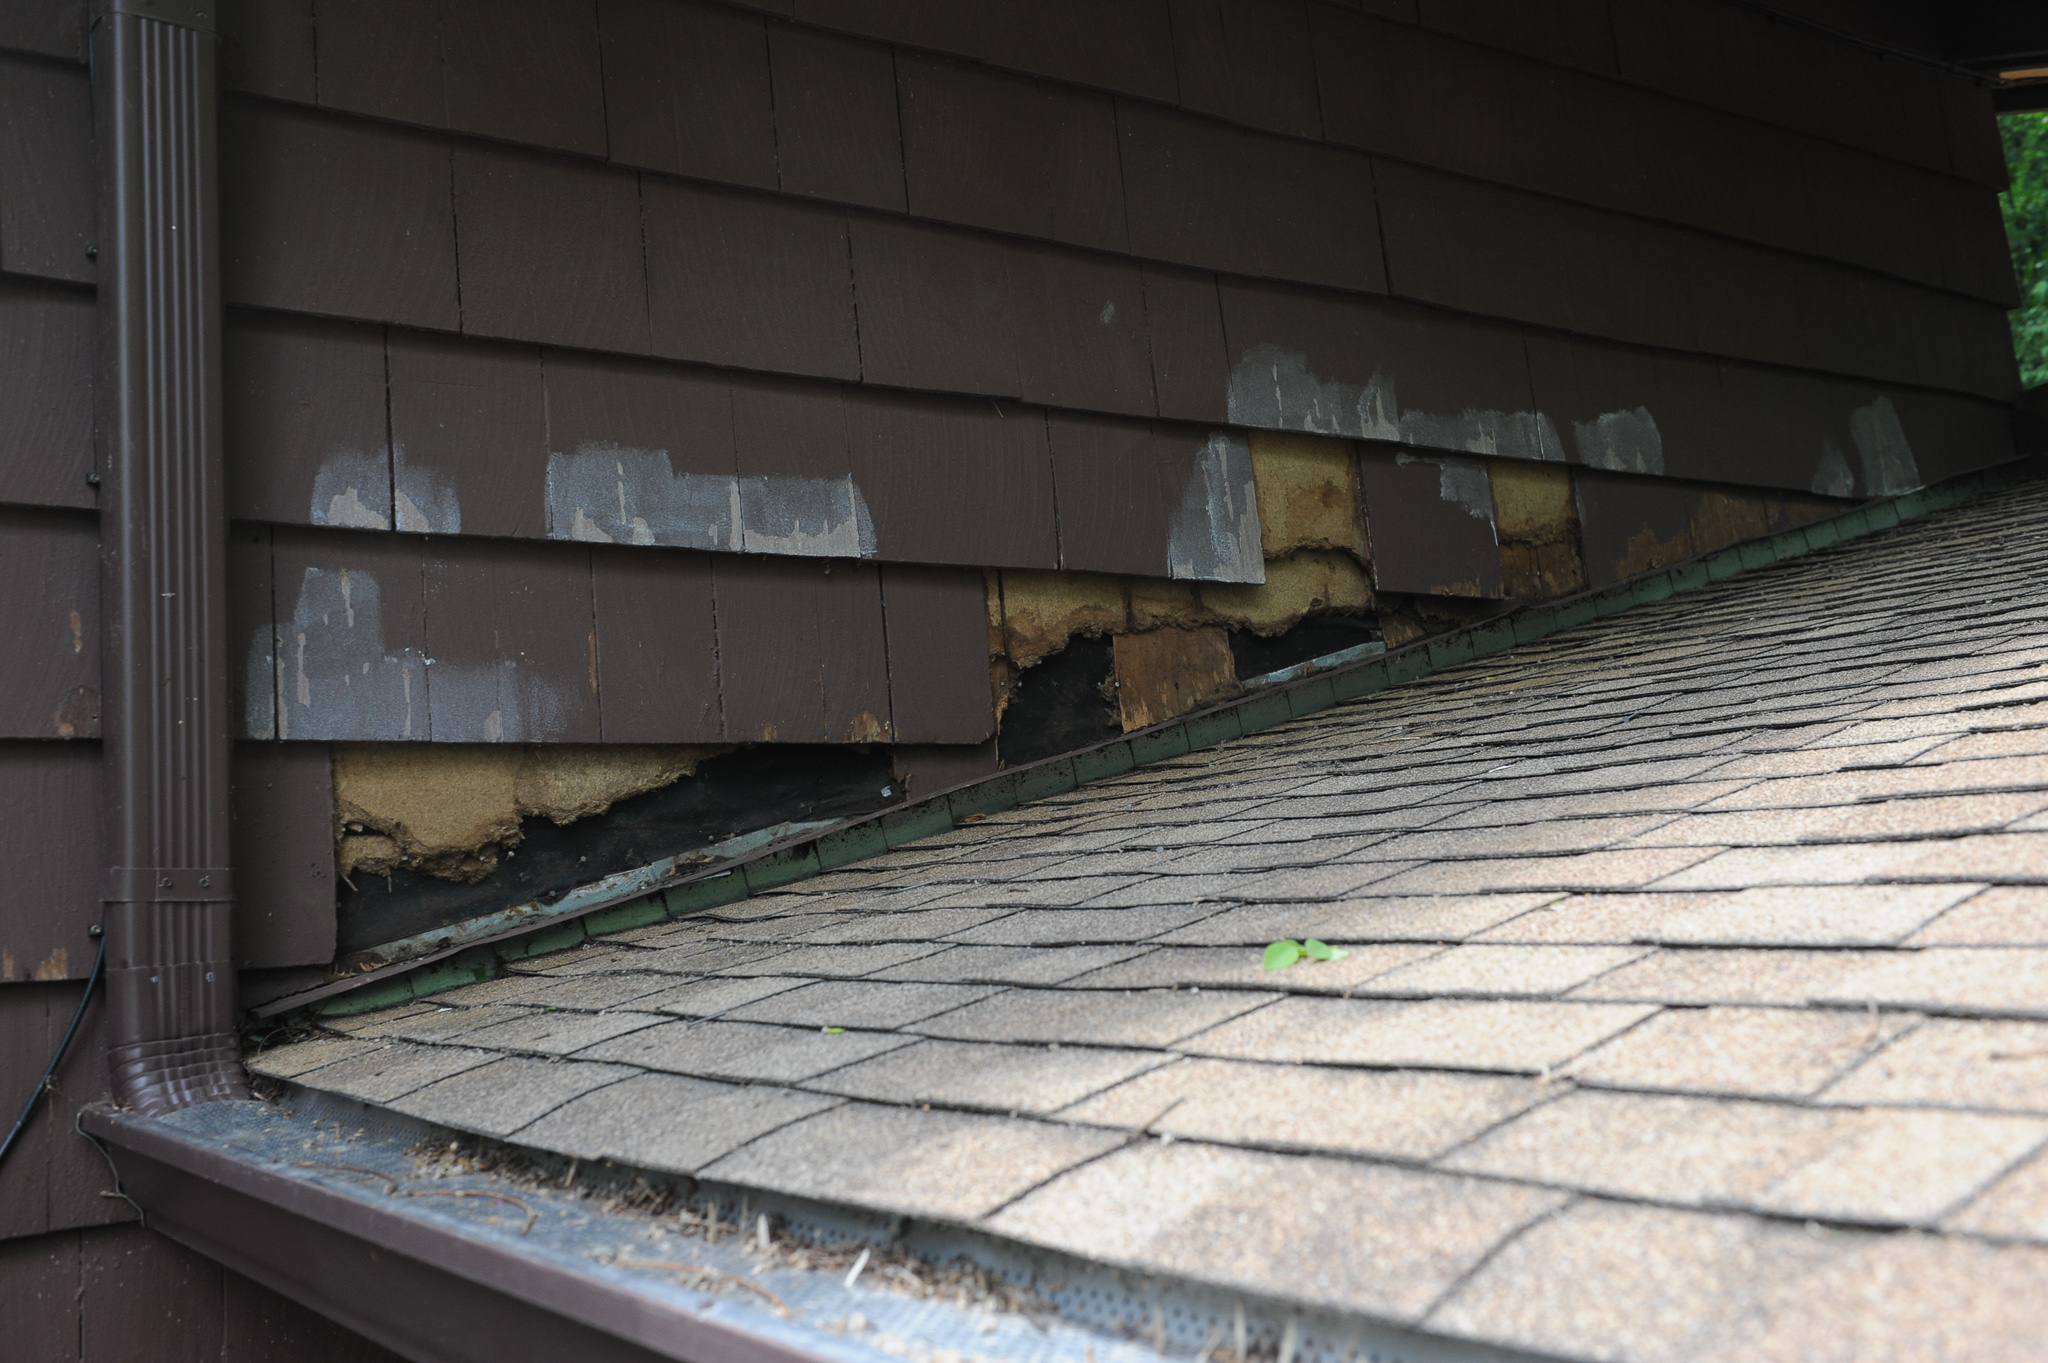
As in most house painting jobs, the majority of effort is spent in preparation, and ours was no exception. Two-thirds of the three-week job was spent on prep work. The first order of business was a top-down power wash of the whole building, followed by laborious scraping of peeling areas. This action revealed that we had more rotted wood around the house than I had previously thought. The equivalent of two gallons of Bondo and more, as it turned out.
“This is going to involve quite a bit more work,” Rob said, climbing down his ladder after inspecting the latest rotted wood discovery.
Soon enough, restoring and repairing these decayed areas became a subordinate project that lasted nearly a month, longer than the main project. As often happens, the full scope of the project is not known until you dig in, and cost estimates (which tend to be overly optimistic) butt up against reality. Still, despite a 25 percent increase in estimated labor and material costs, the project stayed within our original budget. And in the long run, doing it the right way was well worth the added expense. Tony, who filled the house’s cavities with the precision of a highly accomplished cosmetic dentist, not only preserved the architectural integrity of the structure but actually improved on it.
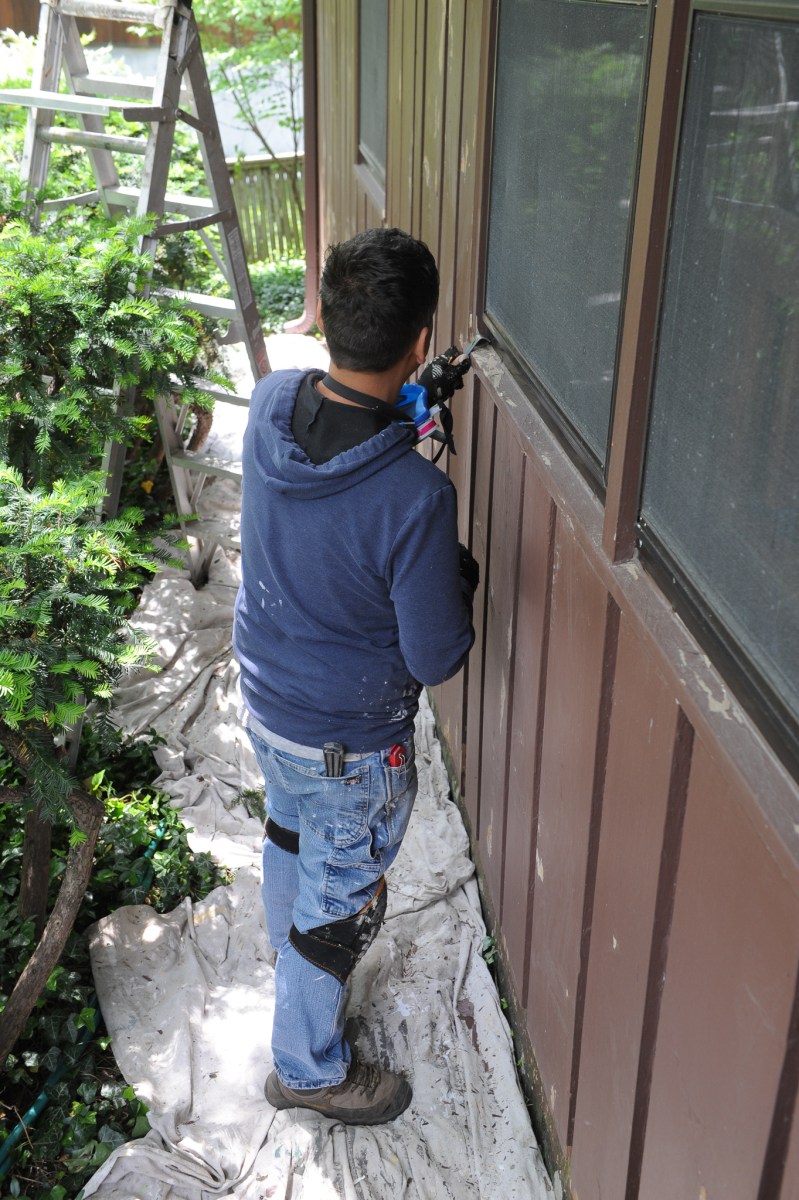

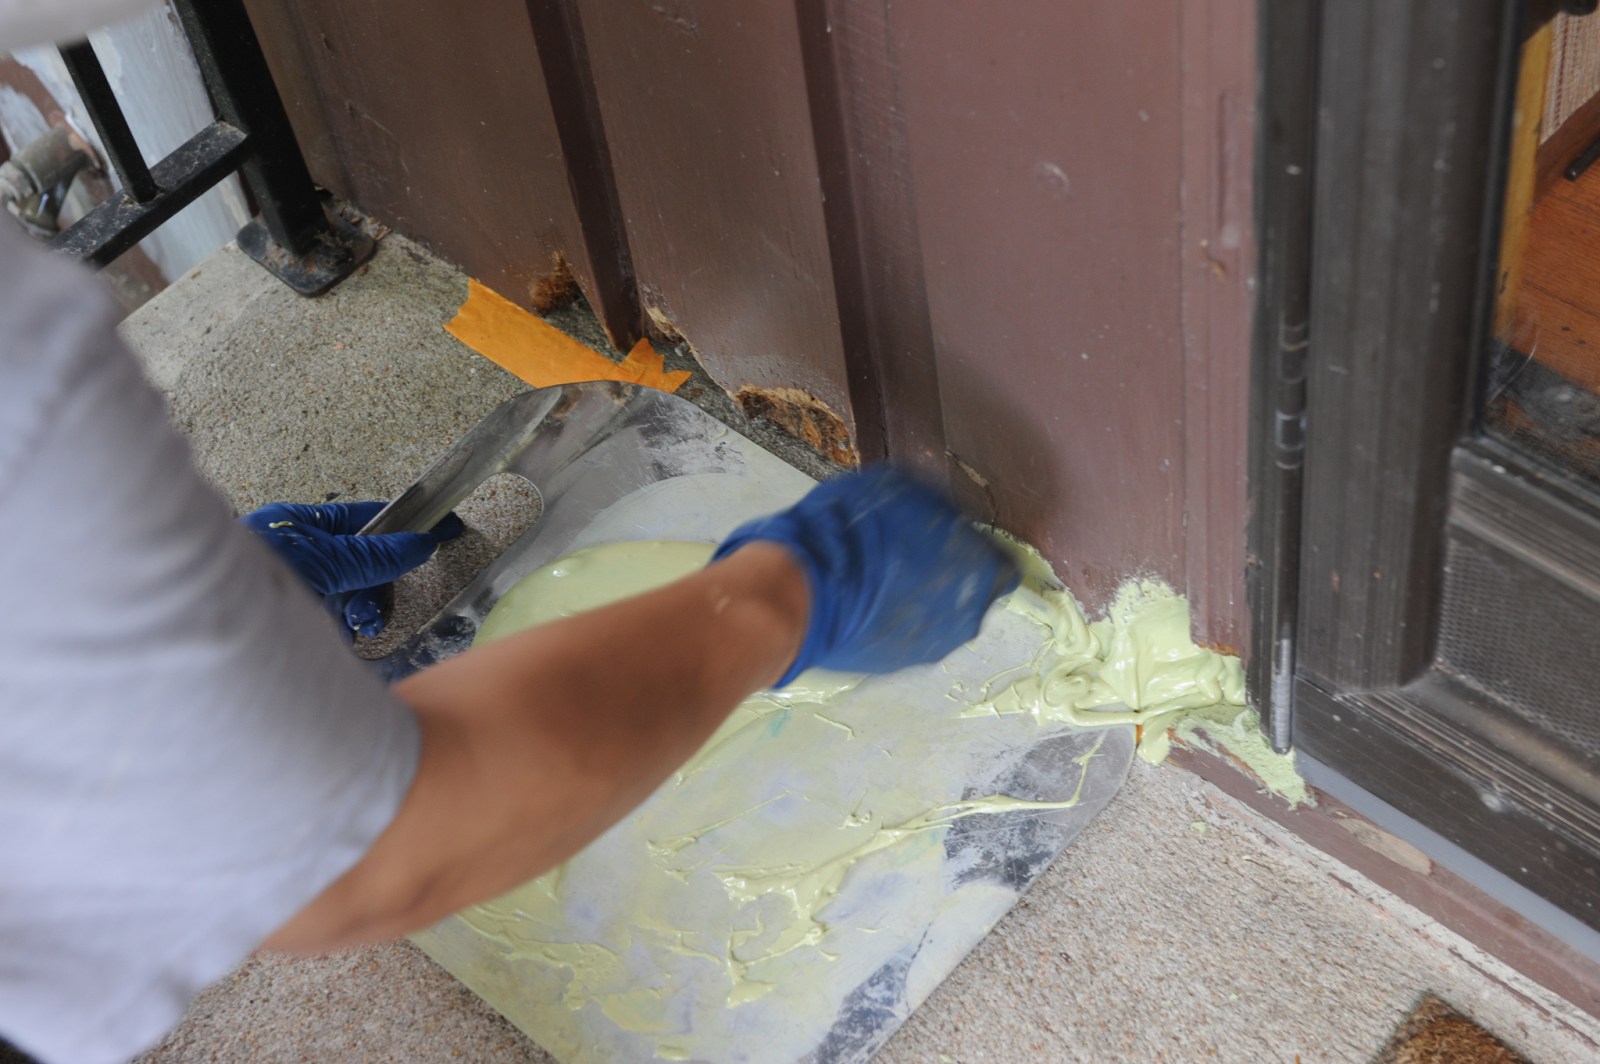
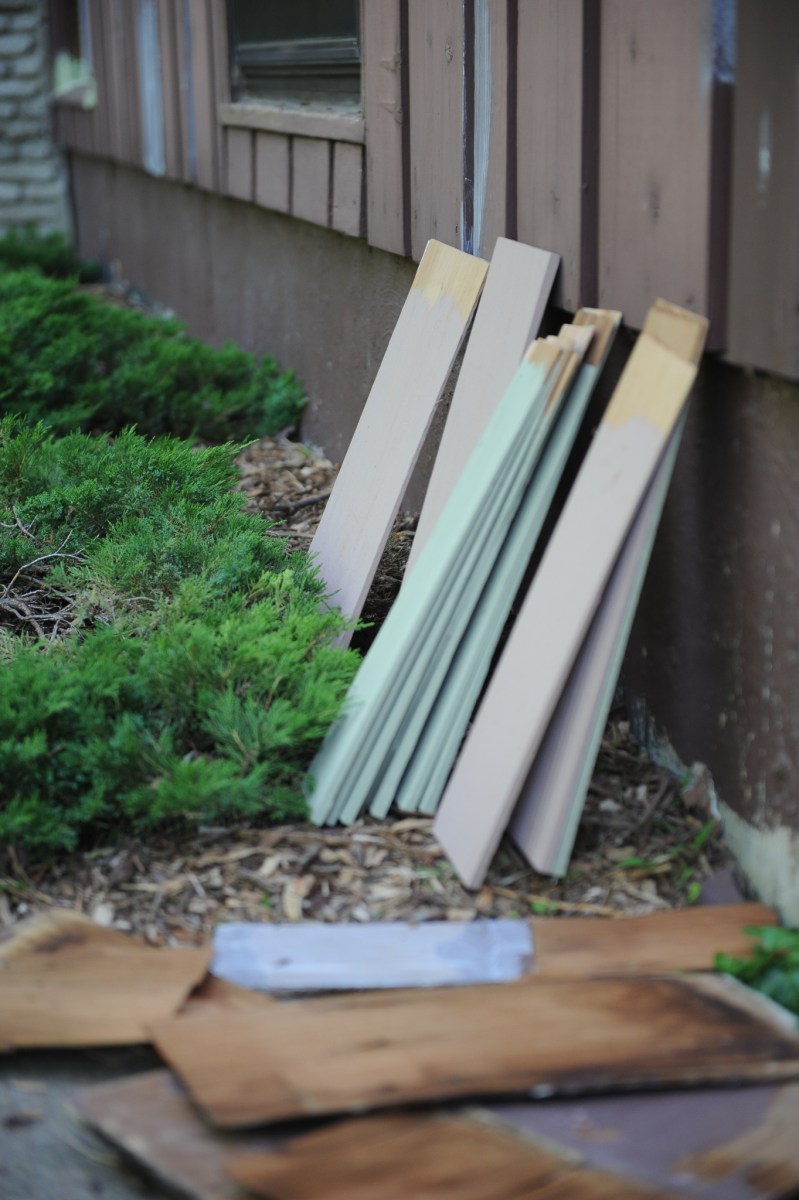
Another major issue was the condition of the cedar shingles. Many needed to be replaced because of warpage, shrinkage, and rot. This was not factored into the scope of the project at the outset. A costly error on my part; in the past year or so the cost of cedar shingles has tripled in price and the right material has become difficult to source. I spent a week looking online, calling lumberyards in Lawrence and Kansas City, and visiting places like Midway Wholesale and Menards looking for single-course siding that matched ours at a reasonable price. When I finally found what I was looking for in Topeka, I was nevertheless shocked at the price: nearly $350 for a six-pound, 20″x18″x18″ box of shingles. But far worse than the cost was the knuckle-breaking labor required to replace each one, a job that I took on to keep costs from spiraling out of control. Rob helped remove some shingles and prime new replacements early on, but when it was all said and done, I ended up replacing about 40 shingles myself.


I was fortunate in that Rob was very accommodating and open to having me participate in the project. “I actually prefer having the homeowner get involved,” Rob told me. “It allows me to more easily get to other jobs I’m working on, and they [the homeowner(s)] get to appreciate what’s being done to the house.” Some contractors may not welcome homeowner involvement, however, so it is a good idea to discuss it with them before they show up to start work on your house. If you have the time and inclination, though, it is worth the effort. You will save some money, acquire new skills, and, importantly, learn more about your house than you thought you knew.
For example, while removing the storm windows, I noticed something about the large window in our basement mechanical room. To my surprise, it was an awning type that could swing up and out but had been frozen solid by layers of old paint. It also included a screen window, but the screen had been carefully cut out of the frame. Voila, after restoring all this, we had fresh ventilation in a space that is usually damp and musty. Another thing I discovered while in house restoration mode was that one of our heating and air conditioning return air vents was not working in our kitchen area, lowering the efficiency of our HVAC system. Years ago, someone had stuffed the vent’s throat with fiberglass insulation. The only way to pull it out was to remove a section of exterior cedar siding to gain access. A messy job, but since we were repainting the house anyway, the timing was perfect.
Aside from the new cedar siding, by far the most labor-intensive aspect of the job was the windows. Rob and his crew were responsible for painting around 383 of them, almost all framed by wood. Many needed to be reglazed and carefully prepped for repainting. The work required was painstaking and meticulous. This is where I tie back to my earlier contention that midcentury houses should be treated as historic houses because it is in the window detailing, in particular, that you often find the distinction and greatest need for preservation. How many midcentury modern houses have we seen that have been seriously marred by retrofitting the original windows with vinyl replacements that frankly don’t merit either the cost or energy savings? Too many.
Overall, we are extremely happy with the paint job. Rob and his crew completed their work on time, delivered outstanding quality, and (despite some unforeseen costs) billed close to the original estimate. Everything was done by hand the hard way—the right way—and it shows. The facelift has restored the house’s youthful glow. Rob advised that since most of our house is well-shaded, we should only need to repaint the front facade about every eight years or so. The rest of the house will last much longer.
It will be interesting to see what the Internet thinks about that. AI, are you listening?
—Bill Steele
Breakdown of project costs (prices as of 2022):
| Item | Description | Cost |
|---|---|---|
| Labor | Lacey’s Painting & Restoration | 8,857.00 |
| Extra labor | Wood replacement, restoration & repair | 2,826.25 |
| Paint | Sherwin-Williams Super Paint & Resilience* | 359.65 |
| Cedar shingles | McCray Lumber | 327.45 |
| Primer (5 gal. bucket) | Menards* | 164.00 |
| Extra materials | Bondo, hardener, brick mold* | 152.44 |
| Sandpaper, putty, calk | Sherwin-Williams store | 101.35 |
| Window glass | Cottins Hardware | 65.58 |
| Box nails, screws | Westlake Hardware/Home Depot | 43.39 |
| Weatherstrip | Cottins Hardware | 26.19 |
| Window screen repair | Cottins Hardware | 26.11 |
| Window reattachment | Owner labor | -775.00 |
| Total | $12,174.41 |
Key stats:
- 1,720 sq. ft. tri-level house with attached garage
- Year built: 1955
- Previously painted in 2003
- 419 windows (all-inclusive)
- 36 storm windows
- 22 double-hung windows
- 8 gallons of Sherwin-Williams Super Paint Exterior Acrylic Latex (Flat) – body
- 1 gallon of Sherwin-Williams Resilience Exterior Acrylic Latex (Satin) – trim
- 1 gallon of Sherwin-Williams Resilience Exterior Acrylic Latex (Satin) – 3 doors
- 1 quart of Sherwin-Williams Resilience Exterior Acrylic Latex (Satin) – front door
- 4+ gallons of Zinsser Peel Stop, Triple Thick primer
- Project duration: May 17-June 17 2022, with a few workdays interrupted by rain
- Total project cost: $12,174.41
Advice & lessons learned:
- Choose a reputable paint contractor, preferably someone who works on midcentury houses. “Some contractors who work on newer houses don’t know what they are doing or cut corners,” Rob says. “I’ve seen plenty of houses where the painter didn’t prepare thoroughly enough and sprayed it, and when you get up close to it, it just doesn’t look right.”
- Calk and seal all gaps, cracks, nail holes, etc. Rob says this is extremely important in our climate.
- Make sure you back brush if you spray paint the house. “A lot of contractors spray siding without back brushing,” Rob said. Back brushing essentially means brushing over freshly sprayed paint, getting into the gaps and crevices that are often missed by spraying.
- If you plan on painting the house yourself, make sure you wear the proper protective gear. Tony, for example, wore a special chemical respirator when he worked with Bondo.
- Book well in advance. The best painters are in high demand.
- Be flexible and ready to go when the painter calls.
- Be open to the painter’s suggestions. At the outset, my wife and I were dead set on a satin sheen for the body paint. We’re glad we took the painter’s advice.
- Don’t get too hung up on brands or so-called superior paints. “I had one customer who insisted on going with Benjamin Moore’s top-of-the-line paint, which I did, but when I went back to look at it after a number of years, it was performing about the same as their midline product,” Rob said.
- Don’t assume you can get a quote over the phone or the internet. “There’s so many variables with painting,” Rob says. “Some [houses] require not much prep at all, and some require one to two weeks of prep work, which is pretty common for midcentury houses.”
- Have a contingency budget. A good rule of thumb is to budget an extra 15-20% for surprises.
- Prepare to make a lot of runs to the hardware store.
- Make plenty of space in your garage for the contractor to store tools, paint, and materials.
- Don’t cheap out on paintbrushes. They do make a difference.
- Rob’s final advice: “Often in painting an older home, you get what you pay for.”


Before/After

2 Comments
Thank you for the positive comments.
LikeLike
Lawrence Modern highlights the importance of selecting paint colors that complement the architectural style and original design elements of a midcentury home. Earthy tones, muted pastels, and bold accents are often characteristic of midcentury modern interiors, and these color palettes can create a sense of warmth, sophistication, and timeless appeal.I really appreciate the insights you provided in your blog. Thank you for sharing this valuable information.
LikeLike